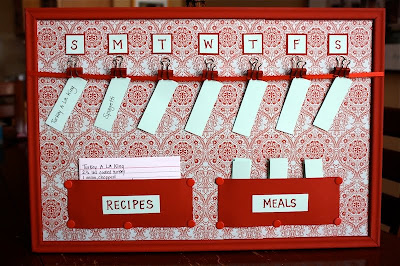
I love Pinterest! I know I've mentioned it before, but I get so many outstanding ideas! My latest idea came in the form of "what are we doing for dinner?" and my response being, "I don't know, let's go out." Thanks to that response (in addition to other factors) I've been lacking the weight loss journey. Let's just say, I am maintaining well, but losing is very hard. Knowing that, I have decided we need to plan better for dinner (which is a downfall for our family, calorie and budget wise).
First I planned my week, Hubby works W-F nights, so it needs to be easy and light. Tues & Thurs Chandler and I have Taekwondo training until 6:30, so it has to be quick and easy to prepare or Hubby has to make it (Tuesday only). Mondays are going to be Singing Christmas Tree practice soon, so it has to be easy. So knowing those things. I needed to be able to plan for the grocery shopping and so I don't go crazy during the week.
I got my ideas for a Menu Planning board from here:

Magnetic Menu Board-Separate side dish magnets.

Meal Planner Menu Board
DIY menu board- She wrote the recipes on the back, BRILLIANT!
I took ideas from each one of these and I am pleased with the results.
Supplies needed:
1 cork board tile, this one is 14x14 (Target, $8 on sale)
18x18 inch square of fabric or size for your board. (I used scrap fabric)
2 18" long pieces of bias tape in coordinating color (I had scrap bias tape)
10 safety pins, the larger size (about 2" long).
Thumb tacks (7-8)
Cardstock in color(s) of choice. ($5 for the pack at Target)
Staple gun with staples
Hot glue gun and sticks
Command Picture Hanger Strips ($9 for assorted pack at Target)
Bound Presentation Binders ($8 ea at Office Depot)
Magazine holder (I had an Ikea one)
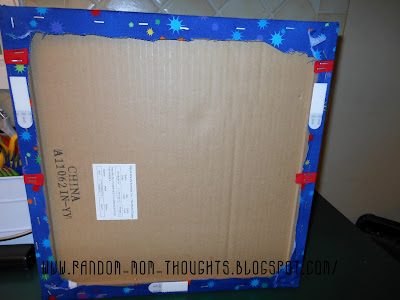
Staple fabric to the cork side of the board. I used more staples than I needed, but I wanted it to be nice and tight. For the corners, I just tucked and made it look nice, using strategically placed staples. Once finished cut extra off.
Now that I know how long the strips would be I can attach the biased tape. Do 2 rows, one for main dish and one for side dish. The main dish strip is about 1.5-2" down from the top, and the side dish bias tape is about 7 inches down from the top. Cut your biased tape and wrap it around, pulling nice and tight, and stapling it on the back.
Using my hot glue gun, I attached the days of the week to the very top of the board. Then I used my handy ruler to go vertically, and I put a dab of glue under the bias tape to keep the paper clips from moving over. You can't see it, but it keeps things nicely spaced, in my opinion.
 |
| A note about Saturday's in this photo: It says Babysitter (main dish) and Pizza (side dish). So I know what we need to do for the sitter. EASY! |
Add your paper clips (I know I had binder clips in the "Supplies" photo, but they were too stiff, so I changed plans, and I like this result much better). I used white on top and black on bottom. I had them, why not? Underneath the red bias tape is the hot glue dab, can't see it! But it keeps things lined up nicely (I am anal about that).
I used Command Picture Hanger strips to attach it to my cabinet door. So easy and not permanent.
To hold the various menu items, I cut a Crystal Light container in half, then cut a hole in the lid. Then I hot glued the lid to the top to keep it cleaner. I used a scrap of paper to cover it. Attached it to the door with a Command strip. I also used a small square of scrap paper and thumb tacks to make a small pocket on the board itself. It holds the side dish options. I made these in code, like the Magnetic board linked above. Q=Quinoa, B=Bread, P=Pasta/Potato, F=Fruit, S=Salad, R=Rice, V=Vegetable This makes it easy! Normally I give the kids the choice on the veggie, so in addition, they might pick something out in addition, which is fine with me.
Then I went to Office Depot, bought 3 Bound Presentation Binders that held 48 sheets. Divided it up and put all my recipes inside. Then I put them in an Ikea Magazine holder on the counter.


