Showing posts with label recipe. Show all posts

08 August 2012

Custom Menu Planning Board


I love Pinterest! I know I've mentioned it before, but I get so many outstanding ideas! My latest idea came in the form of "what are we doing for dinner?" and my response being, "I don't know, let's go out." Thanks to that response (in addition to other factors) I've been lacking the weight loss journey. Let's just say, I am maintaining well, but losing is very hard. Knowing that, I have decided we need to plan better for dinner (which is a downfall for our family, calorie and budget wise).

First I planned my week, Hubby works W-F nights, so it needs to be easy and light. Tues & Thurs Chandler and I have Taekwondo training until 6:30, so it has to be quick and easy to prepare or Hubby has to make it (Tuesday only). Mondays are going to be Singing Christmas Tree practice soon, so it has to be easy. So knowing those things. I needed to be able to plan for the grocery shopping and so I don't go crazy during the week.


I got my ideas for a Menu Planning board from here:

 Magnetic Menu Board-Separate side dish magnets.
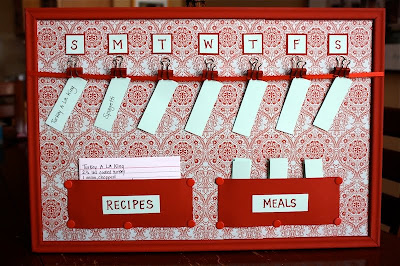
Meal Planner Menu Board

DIY menu board- She wrote the recipes on the back, BRILLIANT!

I took ideas from each one of these and I am pleased with the results.

Supplies needed:
1 cork board tile, this one is 14x14 (Target, $8 on sale)
18x18 inch square of fabric or size for your board. (I used scrap fabric)
2 18" long pieces of bias tape in coordinating color (I had scrap bias tape)
10 safety pins, the larger size (about 2" long).
Thumb tacks (7-8)
Cardstock in color(s) of choice. ($5 for the pack at Target)
Staple gun with staples
Hot glue gun and sticks
Command Picture Hanger Strips ($9 for assorted pack at Target)
Bound Presentation Binders ($8 ea at Office Depot)
Magazine holder (I had an Ikea one)

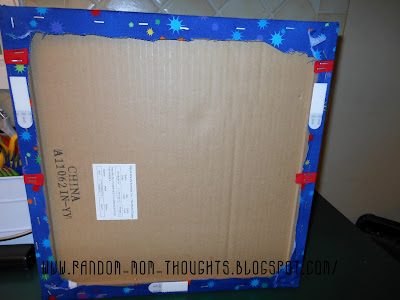
Staple fabric to the cork side of the board. I used more staples than I needed, but I wanted it to be nice and tight. For the corners, I just tucked and made it look nice, using strategically placed staples.  Once finished cut extra off.


Using your computer write up all your yummy dishes. I did mine color coded (no loving the blue though). Red=beef, Chicken=Orange, Pork=Yellow, Misc/breakfast for dinner=Blue, Sides=Green, New recipes, going out, babysitter, pizza=White. I cut the strips using my paper cutter. Don't forget your days of the week as well! One thing I will say, on the back of each strip, are the main ingredients for the dish, that way when I grocery plan, I can know what I really need to add to the list. Loved that idea from one of the boards above!

Now that I know how long the strips would be I can attach the biased tape. Do 2 rows, one for main dish and one for side dish. The main dish strip is about 1.5-2" down from the top, and the side dish bias tape is about 7 inches down from the top. Cut your biased tape and wrap it around, pulling nice and tight, and stapling it on the back.
Using my hot glue gun, I attached the days of the week to the very top of the board. Then I used my handy ruler to go vertically, and I put a dab of glue under the bias tape to keep the paper clips from moving over. You can't see it, but it keeps things nicely spaced, in my opinion.

A note about Saturday's in this photo: It says Babysitter (main dish) and Pizza (side dish).
So I know what we need to do for the sitter. EASY!


Add your paper clips (I know I had binder clips in the "Supplies" photo, but they were too stiff, so I changed plans, and I like this result much better). I used white on top and black on bottom. I had them, why not? Underneath the red bias tape is the hot glue dab, can't see it! But it keeps things lined up nicely (I am anal about that).


I used Command Picture Hanger strips to attach it to my cabinet door. So easy and not permanent.


To hold the various menu items, I cut a Crystal Light container in half, then cut a hole in the lid. Then I hot glued the lid to the top to keep it cleaner. I used a scrap of paper to cover it. Attached it to the door with a Command strip. I also used a small square of scrap paper and thumb tacks to make a small pocket on the board itself. It holds the side dish options. I made these in code, like the Magnetic board linked above. Q=Quinoa, B=Bread, P=Pasta/Potato, F=Fruit, S=Salad, R=Rice, V=Vegetable This makes it easy! Normally I give the kids the choice on the veggie, so in addition, they might pick something out in addition, which is fine with me.


Then I went to Office Depot, bought 3 Bound Presentation Binders that held 48 sheets. Divided it up and put all my recipes inside. Then I put them in an Ikea Magazine holder on the counter.


All Finished! And ready to be used! Let me know what you think, by commenting!
Photobucket

12 January 2012

Ground Turkey Pasta Soup

Finished product, although this is with beef.

Ground Turkey Pasta Soup
Makes about 10 cups Serving size: 1 Cup Calories: 147 Fat: 5 Protein: 12 Carb: 14 Fiber: 2 Sodium: 470 Weight Watchers value: 4 pp

Ingredients:
1 lb Ground Turkey (I used Shelton's Free Range)
32 oz (1 Qt) of Tomato Juice
32 oz (1 Qt Water) & 1 1/2 T of Better than Bullion Reduced Sodium Beef Base -OR- Fat Free, Low Sodium Beef Broth
4 stalks of Celery Sliced
3 Carrots Sliced
4 oz of small elbow pasta1/2 t Minced Garlic
1 t Minced Onion
1/2 t Johnny's Season Salt
1 Bay Leaf
1/4 t Black pepper
Brown the turkey in a stockpot, adding garlic, onion and season salt. Drain if you need to. Add celery and let cook with turkey for a few minutes to soften.
If you've never tried Better than Bouillon, it's worth it! Cheaper and easy to use!

Simmering on the stove.
Add the tomato Juice, water and bullion (or beef broth), black pepper and bay leaf. Let simmer until celery is a bit tender. Add carrots and simmer until tender.
I always weigh pasta. This is what 4 oz looks like (2 servings).

Add pasta and cook 8-10 until done but still firm. Cool in fridge and freeze or eat right away, add some shredded or grated Parmesan cheese and enjoy!

Finished ground turkey pasta soup


Photobucket

14 November 2011

Seriously!? Plus Thanksgiving recipe ideas!

This week, I was doing/trying so hard to be good...only to have a bad day yesterday and blow my weigh in. I know it's a journey and not an overnight thing, but hell, you can kill progress overnight. Up 1.6 this week. Grr.

Today we planned out Thanksgiving. So it got me in the mood to look around for some skinny reciepes for the day. I have found plenty. Besides our Shelton's Free Range (no antibiotics/hormone) turkey breast we'll bake. Here are some things that caught my eye. Of course, you all know how much I love Skinny Taste, so all but one are from her site. Thanks Gina!
Cranberry-Pineapple Sauce
Skinny Apple Cobbler
Skinny Scalloped Potato Gratin
Baked Turkey Croquettes (for leftovers)
Low Fat Green Bean Casserole

So I have a good idea of the plan-so I can just have my meal (since that's all it is) and not worry. Granted it's obviously WAY easier said than done. But I am still trying to have a miracle and hit that blasted 50 by December 1. Today's weigh in didn't help one bit, well it gave me the needed boost to plan my schedule with the gym and Taekwondo in mind. They are appointments-period. I need to make it a priority. I think if I were to do 3 days in the gym  (30-45 minutes of cardio), I could pull off a nice loss next week. I'd love to see 3-4 lb. Until next time,
Photobucket

09 November 2011

Weigh in & measurement progress

This week I weighed in, down 2.6; total of 42.4 lb! Sweetness! I am now officially 7.6 away from my December 1 goal of 50 lb! So I am trying *not* to focus on the numbers... but it's SO hard! I decided to do my measurements, since it had been a few months since I did them. That was a surprise! I have lost 42.5 inches! That's 3 and a 1/2 feet!!!! HOLY COW! So I took a snip it from the WW etools. I thought the graph was pretty cool to see...going down! You can see my August "vacation", but still, very happy to see. Now, to get to the purple line (50#).

I realize this might seem a bit "toot your own horn" but hell, it's my blog & journey! And I am very proud of sticking with this for 11 months! I have never ever stuck with a diet this long, and I think it's because I am looking at it as a lifestyle and not a diet. I am having my cake and ice cream at parties and I don't feel bad! If only I could remember to track more often. I know this is a key to success, so I don't know why I sabotage myself by not tracking... and I suppose I should add more exercise to that as well. But that's ok.

I am still kicking it (literally) at Taekwondo, and I am even more proud on the balance ball! When I began in July, I could barely balance on that damn thing (on all 4's). Now I can hang out on all 4's for a good 1-1.5 minutes! I am even starting to try and get up on my knees only (a requirement for Black Belt testing in 2 years). I managed 5 seconds on Monday! Proof my core is getting stronger! Oh, and even cooler-I did a jump roundhouse kick on Monday! Holy smokes, jumping and kicking! I never thought I'd be able to do that! So I am very proud of where I have come. And I can't wait to see where I am in 6 months!

I did make the Lentil Soup in the slow cooker yesterday that was a recipe from the Weight Watcher Weekly. It was delish! Recipe here Give it a try! Very filling and satisfying! Until Monday (or so), Have a great week!!!
Photobucket

11 October 2011

Time for soup!

As the weather has turned, I have changed my lunches to more soup and sandwiches versus tortillia pizzas, etc. So when I saw on Skinnytaste a recipe for Pasta and Bean Soup, AKA Pasta Fagioli, I had to add it to the list to try. Anyone who goes to Olive Garden and has tried their Pasta Fagioli soup, knows how great it is. And OG's version is actually a great choice, if you do it without cheese!
For a large cup: 130 Calories 2.5 Fat  9 Protein 17 Carb 6 Fiber

Well this recipe was a great knock off and can be done vegetarian style, unlike OG's! Gina has out done herself once again.
From www.skinnytaste.com

 Pasta Fagioli (Pasta and Beans)
Gina's Weight Watcher Recipes
Servings: 5 large bowls • Serving Size: about 2 cups • Old Points: 5 pts • Points+: 6 pts
Calories: 254.5 • Fat: 3.4 g • Protein: 10.3 g • Carb: 47.5 g • Fiber: 6.8 g

  • 1 tbs olive oil
  • 1/2 onion
  • 3 cloves garlic, chopped
  • 1 celery stalk, chopped
  • 1 carrot, finely chopped
  • 1 15 oz can cannellini beans
  • 15 oz can tomato sauce or crushed tomatoes
  • 1 large bay leaf
  • 1 tbsp basil
  • 1 tbsp parsley
  • 1 tsp oregano
  • 2 (14 oz each) cans fat free chicken broth (or vegetable broth for vegetarians)
  • 2 cups water
  • salt and pepper to taste
  • 1-1/2 cups (6 oz) dry Ditalini pasta or other small pasta
  • Grated Parmigiano or Romano (optional)
In a deep pot, saute onion and garlic in olive oil over medium heat.

Blend the can of beans with one can water in electric blender until almost smooth.

Add blended beans to pan then add the can of tomato sauce, celery, carrots, chicken broth, basil, bay leaf, parsley, oregano, salt and pepper. Add 1 cup water and bring to slow boil. Let simmer for 20 minutes stirring occasionally. Add pasta and cook uncovered until pasta is al dente, according to pasta directions.

Ladle soup into bowls and top with grated cheese (extra pts).

*+*+My Notes*+*+
+You can use either Red or white kidney beans, or mix it up and do both, just adjust your nutirtion and liquids.
*I think you could add some hamburger (extra lean), which would raise calories/points.
+Try using 1 each of beef and chicken broth.
*Beans and pasta will soak up the liquid, so if you are having leftovers, plan to have extra broth handy, unless you like a more stew style soup. Both are delish though!
+Freezes well! I made a double batch and froze half in Ziploc bags.

Enjoy, I sure did, and so did Chandler! Score!!!
Photobucket

13 June 2011

Mexican Feast in a slow cooker!

Tonight's dinner was fabulous! I got the main course's recipe off of Friend's For Weight Loss and I tweaked it a bit to fit our tastes.
Crockpot Chicken Bake
  • 1 cup of Enchilada Sauce (red)
  • 1 cup of Fage 0% Greek yogurt
  • 1 tsp of minced garlic (in the jar, or 1 clove)
  • 1.5 tablespoon of cilantro (or 1/3 C fresh)
  • 8 Mission Extra Thin Corn Tortillas
  • 2 Cups of cooked chicken breast, shredded (equals 11.7 ounces)
  • 1 cup of 2% Mexican cheese mix, shredded

  1. Mix the first 4 ingredients in a bowl. 
  2. Prep crock pot with Pam cooking spray if yours tends to have a sticking issue (mine doesn't). 
  3. Place 2-3 tortillas, over lapping and tearing if needed to fit them in the bottom.
  4. Add 1/4 (about half cup) of the salsa mixture, 1/2 the chicken, and 1/4 cup of cheese. 
  5. Top with 2-3 tortillas and spoon in 1/4 salsa mixture, rest of chiken and 1/4 cup of cheese.
  6. Put the last of the tortillas on top, top with the rest of the salsa mixture and then cheese.
  7. Cover and cook on low for 4 hours. 
Serving size is 1/4 of the casserole.
Calories: 375
Fat: 12.2
Protein: 40
Carbs: 24

Now of course you could call it good there, but why not add some sort of side. So I had canned black beans in the pantry. I've never actually cooked them up as a side, only in chili or something like that. So I found a recipe on Allrecipes.com and it was great. Here it is with my tweaks.
Easy Black Beans
  • 1 can of black beans (not drained)
  • 1 t minced onion
  • 1 t minced garlic
  • 1 t dried cilantro
  • 2 t of lime juice

Combine and simmer for 5 minutes. Makes 4 1/2 cup servings.

Calories:112
Fat: .4
Protein: 7.1
Carbs: 20.8


Total dinner calories: 484 and it was tasty!
Chandler loved it. So it's now in rotation! And the beans were so easy, I see us adding those into the side dish rotation! Enjoy!
Photobucket

20 May 2011

Busted?!

I hit WW this morning to do a mid week weigh in... Good news, down 1.8 so far this week! Woot!!!

So that was great! Yesterday I walked my own 5K! I had driven the route to see if it would work, milage wise, and it did!! So I loaded Lincoln into the jogger and we walked Chandler to the bus stop. Once he was on his merry way to school, Lincoln and I were off on our 3.1 mile walk. I was very happy, and I am sore today. The hamstrings are a bit tight, as are my calves. No worries. I'll be back to normal in no time. But I was very proud of my acomplishment. I had a goal to do a 5K by May 21st, and I did it! Even if it wasn't an "official" 5K that you have to pay $20-50 to do, it still counts in my book. Now to keep it up!

Then today I was reading a friend's blog, looking for something to cook for dinner, and I found this funny flow chart on how to find food:
Here's the orignal source of the photo: Funny Flow Chart and here is her blog Cooking Claire
Check out her blog it's got some great recipes. I will be adding it to the blog roll soon! :)

I hope on Monday the weigh in goes well, and I can mark this plateau as BUSTED! Have a great weekend. Hope you get to enjoy the sun!

25 March 2011

Diet Soda Cupcakes

Yes, you did read that right. I promise it's not as odd as it sounds! It was super easy too! Thanks to Skinny Taste for this awesome low calorie/fat recipe. Since it was Chandler's birthday this week, I was trying to plan/figure out what I would do for his birthday. Obviously we'd have cake from the store, but I wanted something I could eat and not feel guilty about. I am telling you you'd have no clue the soda I used was Diet Cherry Dr. Pepper in a German Chocolate Cake! We topped the cupcakes with light cool whip and 1/4 of a dark chocolate Reese's Peanut Butter Cup. Be creative!

So I looked at Gina's Skinny Recipes and found Diet Soda Cake, omitting all oil and egg yolks and subbing in diet soda. Sounds easy enough and it was, give it a shot. Oh and the kids loved them, and so did the adults!

Diet Soda Cupcakes
Gina's Weight Watcher Recipes
Servings: 24 Serving Size: 2 cupcakes Calories: 173 • Fat: 3 • Carbohydrates: 36 • Protein: 2.6
  • 1 dry box cake, any flavor (For the calorie info above I used a German Chocolate cake with 170 calories per serving in the mix)
  • 10 oz diet soda, any flavor
  • 2 egg whites
  • Cupcake Liners
Preheat oven according to box directions. Insert the liners into the pan.

Beat cake mix, diet soda and egg whites. Pour into liners, filing half full.

Bake as directed on box, or until toothpick comes out clean when inserted, about 24 min

Let cupcakes cool.

Top
with fat free whipped cream if you wish, maybe even a Reese's PB Cup (not included in calorie info). Enjoy!

Apple Bread Review


So I mentioned on facebook that I was making Apple Bread this week. It was delish! I got the recipe from the blog My Kitchen Adventures. Renee does an amazing job taking pictures of her yummy creations and well she make it very hard *not* to try this Apple Bread. This was so heavenly smelling in the oven. Lincoln loved it. You cannot tell you used grated apple (food processor is the best for this, FYI), it was very soft and moist. It was gone in one day. It was very hard not to eat just 1 slice. I dare you to try.

I made a few changes to her recipe to adjust for what I had in the house. But for the most part it was the same.
Apple Bread

Servings - 12 Serving size- 1/12th Calories - 152 Fat- 5.2 Carbohydrate- 24 Protein- 3.5

2 C. bleached all purpose flour
1/2 C. white sugar
1 tsp. ground cinnamon
1tsp. baking soda
1/2 tsp. baking powder
1/2 tsp. salt
1 egg + 2 egg whites
1.5 C. grated fresh apple
1/2 C unsweetened applesauce
1 tsp. fresh, grated ginger root
1/4 C canola oil
3 TBS. 1% milk
1/3 C brown sugar
1/2 tsp. ground cinnamon

Preheat oven to 350 degrees F. Coat a 9"x5"x3" loaf pan with cooking spray.
In a large bowl, combine the flours, sugar, 1 tsp. cinnamon, baking soda, baking powder, and salt. Set aside. In another bowl, whisk together the egg and egg whites, applesauce, oil and milk. Add the grated apple and ginger and combine. Add the "wet" ingredients to the dry and mix until just combined. In a small bowl, combine the brown sugar with 1/2 tsp. cinnamon. Pour batter into prepared loaf pan and sprinkle with brown sugar/cinnamon mixture. Bake for 55 to 60 minutes, test at 50 though, or until a toothpick inserted in the middle comes out clean. Cool on rack and slice into 12 pieces.

Thanks Renee for such a great recipe!!! And for proof that kids do like this, here's Lincoln itching to get to the bread!

08 February 2011

Chicken Fingers!

Rob was at school (again, lol) and we had chicken breasts somewhat defrosted (darn sink for emptying without my knowledge). I got the chicken safely defrosted, and went to my laptop to figure out what to do with them!

So I figured I'd look at recipes online. I found one on the WW site but I am not a huge fan of mustard. After reading the reviews, someone suggested egg whites, so here's what I came up with! It was a hit with the boys, and Chandler asked to take some left overs to lunch tomorrow. We served it with rice and frozen corn.

Chicken Strips
Weight Watcher's Points plus: 4
  • 1.5 lb of chicken breast, cut into strips.
  • 3/4 C of bread crumbs
  • 1/2 C of egg white substitute
  • 5 sprays of PAM, divided
  • Italian Seasonings, Salt & Pepper to taste
Preheat oven to 450ºF. Place a large baking sheet in the oven to preheat.
In a shallow dish, pour in egg whites. Place bread crumbs with seasonings in a separate dish, mix well. Add chicken to egg whites; turn to coat. Transfer chicken to bread crumbs and turn to coat.
Remove the hot baking sheet from oven and coat with cooking spray. Place chicken on baking sheet, spray chicken with cooking spray (helps brown) and bake 6 minutes; flip and bake until golden brown and cooked through, about 6 minutes more.
A serving is approx. 3 oz, cooked, Serves 6.
Enjoy!

01 February 2011

Teriyaki Pork Stir Fry

Rob had school tonight and the boys wanted pizza (tortillia pizzas). But I needed something more. We had teriyaki pork tenderloin Monday night, so we had exactly 3 oz left over. We also had some pineapple with dinner Monday night, so we had some of that left over as well. So this is what I whipped up!


Teriyaki Pork Stir Fry
Weight Watcher's Points Plus: 10
  • 3 oz Pork Tenderloin, cooked
  • 3.5 oz carrots, sliced
  • 1 oz Snow Peas, chopped
  • 1.5 oz fresh pineapple, chopped
  • 1/2 cup of cooked Quinoa
  • 2 t Extra Virgin Olive Oil
  • 1/4 teriyaki sauce (we used New Season's Wok bar's teriyaki)
  • Sesame Seeds for garnish
Warm Wok or frying pan with medium high heat, add EVOO. Add carrots and peas saute until tender or to your liking (I like my carrots to be cooked but still crunchy). Then add pineapple and pork to heat through. Add the quinoa and teriyaki sauce and stir to combine.
Add to a bowl and enjoy!